Saturday 8 December 2012

Chocolate Avalanche Pie


Layers of creamy, chocolate deliciousness are the key features of this more than fantastictal winter warmer. Covered in rum and cinnamon cream and topped with chocolate flakes, oh and a base of chocolate pastry, I'm sure this will take you to your very own winter wonderland.


This charmer is a  variation of a recipe I found in an old book, I thought I might try it out, and my my my, I would kill for this now, and maybe you will too... Figurativly of course ;) The perfect thing for a Christmas dessert to share. Or not, if you're feeling up to the challenge..


Ingredients; Makes a 23cm/9 inch pie

For the Pastry:
  • 225g Plain Flour
  • 2 tbsp Cocoa Powder
  • 150g Butter
  • 3 tbsp Caster Sugar
  • 1-2 tbsp Cold Water
  • 1 tsp Ground Nutmeg
For the Filling;
  • 175g Butter
  • 350g Brown Sugar
  • 4 Eggs, Lightly beaten
  • 4 tbsp Cocoa Powder, Sifted
  • 100g Plain Chocolate
  • 50g Dark Chocolate
  • 300ml Single Cream
  • 1 tsp Strong Coffee (Just put a spoonful of granules in a glass with hot water and mix)
  • 2 tsp Ground Cinnamon
  • 1/2 tsp Nutmeg
Topping;
  • 400ml Double Cream, Whipped
  • 3-4 Drops Rum Flavouring
  • 2 tsp Ground Cinnamon
  • 50g Chocolate to be made into flakes and curls (in recipe)
Yeah, okay, I know that looks like a very long list of stuff, but it's worth it. Waaay worth it.
Click 'Read More' for the Recipe and Photo Tutorial!

Tuesday 13 November 2012

Cinnamon Swirl Catherine Wheels

Buttered Pastry swirls filled with chocolate, raisins, sugar and of course, the key ingredient, Cinnamon! What could be better on a cold November evening?


Last night, I was feeling slightly down thinking about how my half term holiday was coming to an end after watching the fabulous firworks light up the night sky and couln't help but want to eat something that would make me fell all warm and fuzzy inside, so I raided my cupboard for Sugar, Spice and all things nice and threw together this recipe. After cooking them, definatly my favourate part was just to smell the warm scent of cinnamon wafting through the kitchen, and the don't taste too bad either. They definatly cheered me up, and hopefully they'll do the same for you.

Also, I've decided to try and modeify the layout of these posts. I know you people probably don't need to see all these stages, and really only need photos when things get confusing, however, as the posts take up a whole ton of space, I'll try to make the photos smaller, and remove the captions which are probably space and time wasting when you try to print. So from now on, I'll number the recipe stages and just put the corrisponding number to the correct photo. Hope this makes things easier! x


Ingredients (Makes about 10 swirls);
  • 1 x 320g Pre-Rolled Puff Pastry Sheet (or as close to 320g as you can get)
  • 50g Butter, Melted
  • 60g Demorara Sugar
  • 30g Raisins or Sultanas
  • 20g Chocolate, Grated
  • 1 & 1/2 tsp Cinnamon
  • 3/4 tsp Ground Nutmeg


Method;
1. Preheat the oven to Gas Mark 7 / Roll out the pastry sheet, try to get one that is already on a sheet as this will make things easier. After it is flat melt the butter in a small dish and use a pastry brush to lather the pastry with the butter. Make sure that you spread it to the very edges, this is important. You should have some left over butter, you will need this later.
2. Next sprinkle the sugar over the pastry, once again making sure completely even coverage of the pastry
3. Do the same with the rasins or sultanas followed by the chocolate. If possible use a very fine grater as this allows the chocolate to melt easier, but if you don't have one, then a larger grater will be fine.
4. Finish the pastry off with the Cinnamon and the Nutmeg. This is probably the hardest part as it can be difficult trying to get the spices to be evenly distributed over the pastry so I would put the spices on a spoon and gently tap it, covering the pastry until it looks relitivly even.
5. Now cut lengthways down the pastry with a sharp knife. Make the ribbons about 3cm wide and only cut one at a time.
6. Start at one end and begin to roll up the pastry so that it looks like a snail. You may find that the pastry sticks to your fingers, if so then use a little flour and try to touch it as little as possible. I found the speed was the skill here and I worked the pastry into a curl by 'walking' my fingers over the curl quickly so that it didn't stick. It may take a few tries to get it right, but you'll get the hang of it.
7. At the end of each curl dab a little butter so that the curl sticks and place it onto a baking tray lined with baking parchment
8. After you've done all the curls and they are on the tray, use any extra butter to brish over the curls. Also if any of the fillings fell off during the curling process, then pick this up and scatter of them.
9. Cook in the oven for 10 minutes and don't let them burn. They are best eaten when warm but will keep for a few days.


Stage 1 - See how I stupidly put flower underneath the plastic

 Stage 1 - Buttering
 
Stage 2-3
 
Stage 3-4
 
 Stage 5- Cutting Ribbons
 
Stage 6 - We is rollin
 

Stage 7
 
Stage 8 - Sprinkling over what's left and oven time!
 
Please Comment, Rate and Enjoy!!

Thursday 25 October 2012

Banana Chocolate Cinnamon Muffins


These muffins are sweet, with a chewy top, fluffy interior and have lushious chunks of chocolate to boot. These didn't last long in my house!

Hi again everyone! College life has been really busy, but that doesn't mean that I haven't been cooking.. So here's the latest, direct from me to you. These muffins worked up a storm and I think I'll be cooking them again pretty soon. I found this recipe in a book, and enhanced it to give it a kick. I don't love strong banana flavours so only used 2 instead of 3. But if you love bananas, then by all means add the third! Made with ingredients that you probably have lying around your kitchen so you might not even have to buy anything else at all!


Ingredients; (Makes about 12 Muffins)
  • 275g Self Raising Flour
  • 1tsp Bicarb of Soda
  • 1/2 tsp salt
  • 2 Large bananas
  • 125g Golden Caster Sugar
  • 1 Large Egg, Beaten
  • 50ml Semi-skimmed Milk
  • 75g Unsalted Butter, Melted and then Cooled
  • 50g Plain Chocolate, Chopped (plus a little extra to shave on top)
  • 1/2 tsp Ground Cinnamon
  • 1/4 tsp Ground Nutmeg


Method;

1. Heat the oven to Gask Mark 4 / 180'C / 375'F and melt the butter in a small dish or ramikin, in the microwave and allow it to cool. Line a Muffin tin with cases either paper of silicon.
2. In a large bowl, sift together the Flour, Bicarb, and salt together and put it to the side.
3. In another bowl, peel the bananas and mash them together with a fork. You'd think this would be easy, but I almost broke my arm doing this... Add in the Sugar, Egg and Melted Butter and mix together. Put this into the flour mixture along with the chopped chocolate. Add in the cinnamon and the nutmeg. Don't overmix. Just until the flour has been incorperated.
4. The mixture will be lumpy, this is good. Use a self serving ice cream scoop (with a mechanism that pushes things out) for even and extra speedy filling of the cases. If you don't have one, then just use 2 spoons...
5. Bake for 20 minutes or until the tops are golden and a skewer comes out clean. They can keep for several days, but should really be eaten the day they are made.
6. As an added touch, you could grate a little chocolate over the muffins while they are still hot

Enjoy!
Melt the Butter

Mix it looks like it's starting to separate

Chop the chocolate


Seieve the ingredients so that there is plenty of air in the mixture
 

Mash the bananas


Mix the ingredients together

Add them to the flour mixture. It looks like snowy ice caps in ocean to cinnamon bananas


I love this tool!!!


Fill em up!
 
 
Please Comment, and Above all, Enjoy!!!!

Thursday 4 October 2012

Sticky Sultana Fruit Cake


A golden sticky cake, moist and filled with gooey sultanas. A good hearty cake with a slight crunch just to boot.

I wanted to do some cooking this week and for a dead quick and simple recipe I turned to this. This was originally a Delia Smith recipe, but with a few adaptations, here it is! It's really simple, really fast and disappears just as quickly! Made it for a church coffee session and it was gone in minutes. It matures to a more intense flavor as well as becoming stickier if left for a few days.


So, to the Ingredients;

  • 225g Self Raising Flour
  • 175g Demerara Sugar
  • 250ml Cold Tea
  • 225g Sultanas
  • 1 Large Egg
  • Pinch of Salt
  • 1/2 tsp Ground Cinnamon
  • 1/2 tsp Ground Nutmeg
  • 1/2 tsp Ground Mixed Spice

Put the sultanas in a bowl and soak for about 5  hours in the cold tea or overnight if it's easier, so that they become large, fat and juicy. Preheat the oven to Gas Mark 4 / 180'C / 350'F. Do this at least 20 minutes before baking the cake. Well grease and line a 2 lb (900g) loaf tin or two 1 lb loaf tins. However, I cooked mine in a round deep tin. You can either use grease-proof paper, like I did, or buy cake liners, but hey, I love to make life more difficult for myself :P In a large bowl mix the flour, salt and sugar and sultana mixture (If you're sultanas soaked up quite a bit of tea, as mine did, then add a little extra tea to level it off). Beat the egg in a jug with a fork and mix this in. Finally add all the spices and mix in evenly. Spoon the mixture into the tin and bake for 1 hour. Leave in the tin after cooking for 15 minutes before taking out. Allow it to cool and serve on it's own or with butter. If you cooked yours in a 2lb loaf tin and it isn't cooked after 1 hour then remove from the oven, cover with foil and bake for another 10 minutes.

Just showing how I lined my baking tin. I cut a long strip that was higher than the tin, and then cut small slices down one edge and so I could fold it into a circle. 

I didn't cut a circle for the bottom although you can, but I used the pre-cutout teflon cake liners I had

Soaking the raisins in the cold tea

You don't have to, but I separated the tea from the raisins so that I could top up any liquid that had been absorbed

Raisins and tea go in..

Adding the Flour Sugar and Salt

Mix ... It coming together now

Whisk the egg in a jug with a whisk (surprisingly) or fork


Add the egg in and mix

Finally, add in the spices with some magical casting... and a few pew pew pew

Pour into tin sweet tin

Smooth out, or if you're lazy just et it gloop level ;)

Mwahahahaha.......

Please comment, and as always, Enjoy!!!

Tuesday 18 September 2012

Sugar Free Chocolate Coffee Cupcakes with Sugar Free Frosting

A rich chocolate cupcake, with a thick and fudgy chocolatey butter-cream with a crumbly sweet texture. Mmmmmm
Oh, and HAPPY NATIONAL CUPCAKE WEEK! So I thought I get you started with something that won't burst your belly...


While on one of my crusades to loose weight, I wanted to enjoy the tastes that I loved, without losing the flavour. So I came across the recipe online and just had to try it myself.I amended it slightly just to make them perfect. These are perfect if you're trying to cut out sugar, as these use Splendor as an alternative so can be classed as completely sugar free. However, the manufactured sugar has a slight aftertaste, so if you are able to eat a small amount of sugar, I would suggest adding a tablespoon or two to the cake mix, just so the cakes are sweeter and even more gorgeous.

Ingredients; (Makes 10-12 cakes)

For the Cake Mix;

  • 60g unsweetened cocoa
  • 125ml boiling water
  • 150g sifted cake flour (sift, then measure) To make this Use Plain flour. Measure it out, and then remove 3 tbsp and replace with 3 tbsp Cornflour
  • 25g granulated Splenda
  • 1/2 tsp baking soda
  • 1/4 tsp salt
  • 175g butter, at room temperature
  • 2 large eggs, lightly beaten
  • 60ml whole milk
  • 1 tsp pure vanilla extract
  • 1 tbsp Caster Sugar (optional but it helps to remove the slight aftertaste of Splender)
For the Frosting;
  • 60g unsweetened chocolate (Good quality)
  • 80ml heavy whipping cream
  • 60g butter, softened
  • 4 tbsp Splenda (6 small packets)
  • 1 tsp pure vanilla extract
  • 1 tsp chocolate extract or strong prepared coffee
  • Gold Edible Glitter (optional)

Method;
Preheat the oven to Gas Mark 4 / 350'F / 180'C, and line a muffin tin with cases. In a small bowl, whisk together the cocoa and boiling water until the mixture is smooth, and put to the side. In another bowl, combine the flour, Splenda, optional sugar, baking soda and salt. Add butter and mix until the mixture is crumbly in texture. Into a separate bowl put the eggs, milk, cocoa mixture and the vanilla essence. Put a third of this mixture in with the floured mixture and combine together, with an electric mixer on the slowest setting. After it appears to be mixed, increase the speed to medium and beat for a further 30 seconds. Use a spoon to scrape the mixture down to the bottom of the bowl. Add another third and mix in like the last. Then repeat again until all the wet mixture has been added. Using a spoon or an ice cream scoop, put the mixture into the cake cases. Bake for about 18-20 minutes until you can insert a toothpick in the center and it comes out clean. They will looked cracked when cooked but this is normal. Place on a wire rack and let them cool completely. 
While the cakes are cooling, make the frosting. In a glass jug or cup heat the chocolate in a microwave in 30 second bursts (it took me 3 times to do this) then stir with a spoon until no lumps remain. Put into a larger glass bowl and add the cream into the chocolate, whisking as you go. Use and electric mixer and beat on a medium speed and then add the butter, Splenda, cocoa, vanilla and chocolate or coffee extract. Beat until flffy and smooth, which takes a few minutes. Either spread the frosting directly onto the cakes or put in a piping bag and pipe onto the cupcakes. If you're piping on the icing, you may only cover around 7 of the cakes, so save a bit to spread over the last ones. If the mixture doesn't easily pipe (although mine was fine) then you can refrigerate the mixture for about 25 minutes to allow it to stiffen up a bit. Add the glitter if you wish, as it makes everything better :D
Eat the day you make them, as they don't keep too well, but I'm sure that won't be a problem. As always, Enjoy!
Making the chocolate mix with the cocoa and boiling water

Measuring out the ingredients in my awesome all-measures jug

This is the Flour, Spenda, baking soda and salt mix. 

Mixing everything together in the bowl

Adding the room temp butter...

Cream them together using the 'scraping' technique and making small butter lumps with your spoon until everything is mixed together

It should look like this, with everything combined

Add the rest of the ingredients to the cocoa mix

Whisking it until smooth..

Add a third at a time and mixing (with an electric mixer)

After the first third it should start to look like this

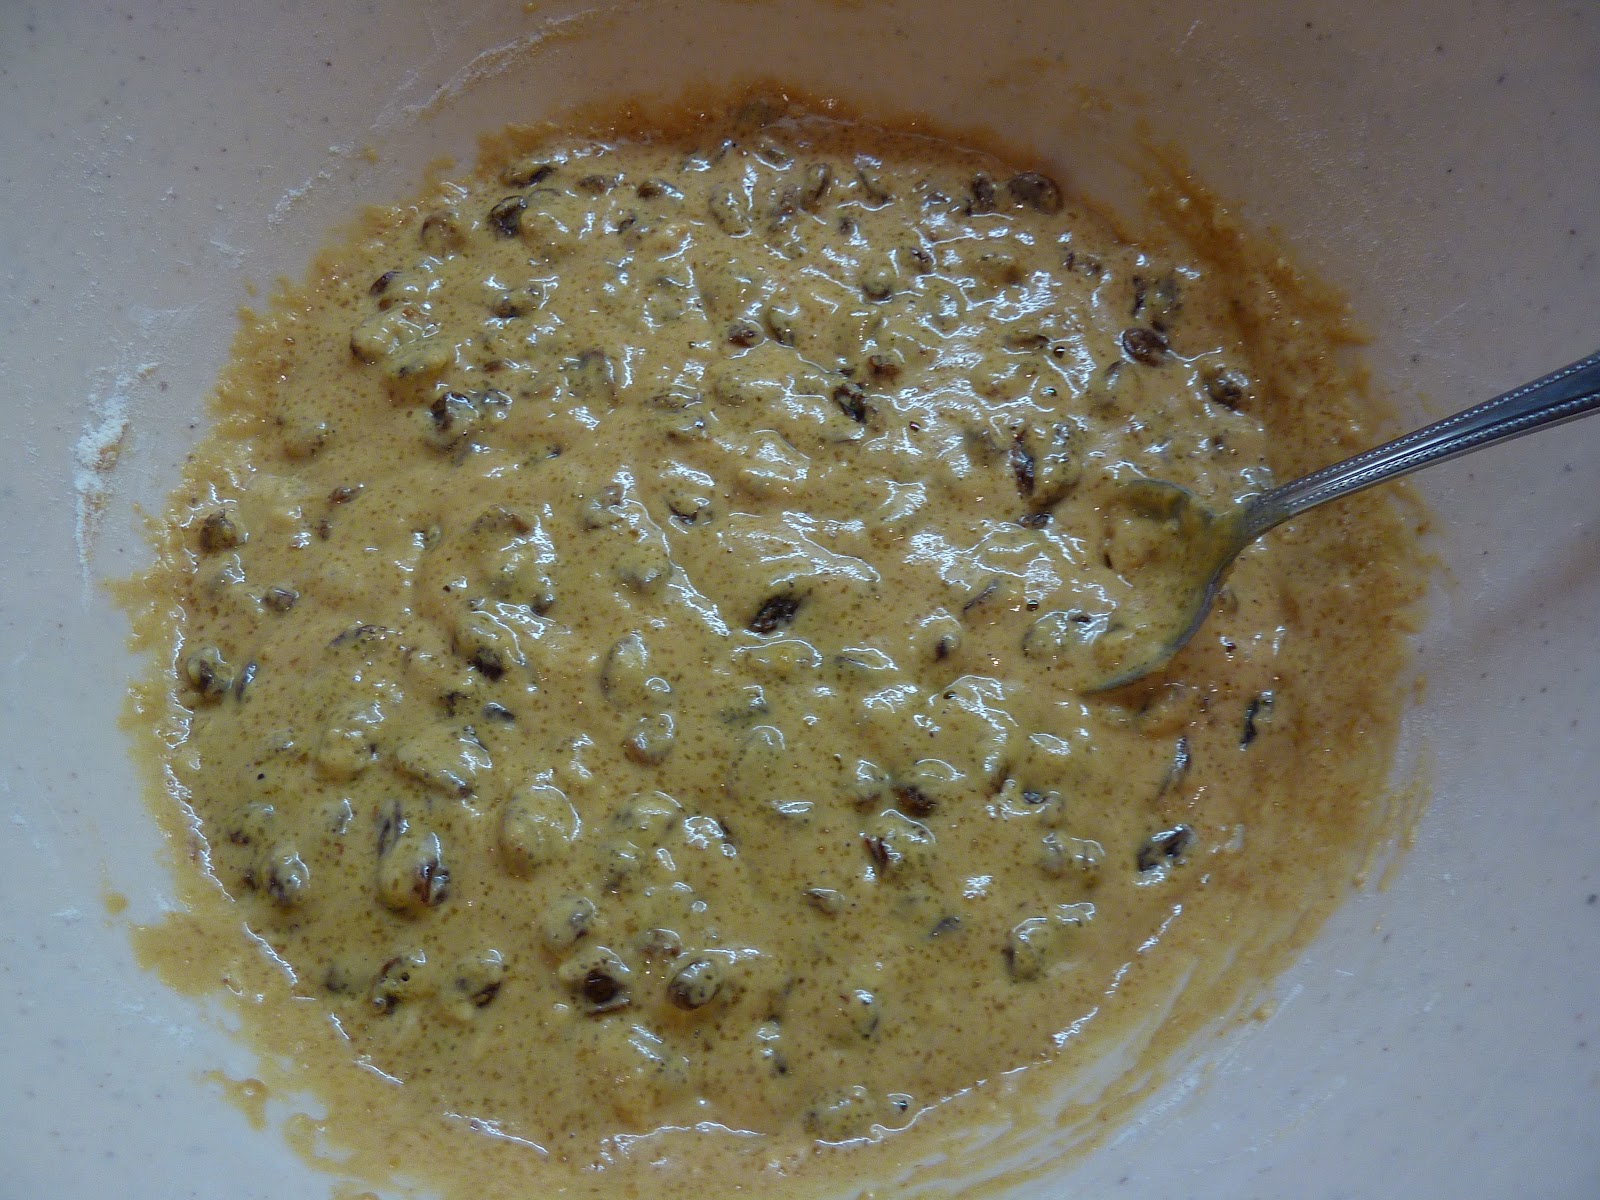
Adding the last third, the mixture should be pretty chocolaty now :)

It should look something like this..

Spooning the mix into the cases

Once all the cases are filled..


The cupcakes will look cracked, but have to fear, Esther is here! (along with a large dollop of frosting)

Just letting them cool before deco time

Making the frosting, I had quite a bit of chocolate left over from the Chocolate truffles (also on here) and so decided just to use that :)

It should start to melt nicely after the microwave bursts, but feel free to taste now, obviously

Putting the chocolate in the bowl... I used the same bowl that I used to make the cake mix in

Doesn't this look like a cool guy with big lips? Or is it just me... 

Mix the cream and chocolate together...

Add the rest of the ingredients and mix 

It should look like this. It tastes AWESOME!

Either spread on with a knife or use a piping bag. I used one with a star-shape nozzle but use whatever you like. Oh and don't forget to add the glitter if you like :)


Please Comment and Rate! Thanks for Reading!